Speaker Placement & Setup
Too often, calibrating a home cinema is a task that is often entirely left to the AV Receiver/Processor and an ‘Auto Setup’ or ‘Auto EQ’ feature. However, by taking steps to choose and set up your equipment properly, you reduce the requirement for EQ and less is always more with audio. EQ should be thought of as a band-aid for small problems; there just to add a final polish to the end result. It should not and cannot make poorly chosen, or positioned loudspeakers perform optimally. For that to be possible, we have to start with the basics and in this article, we will deal with the front loudspeakers.
Positioning – Why we’ve done what we have
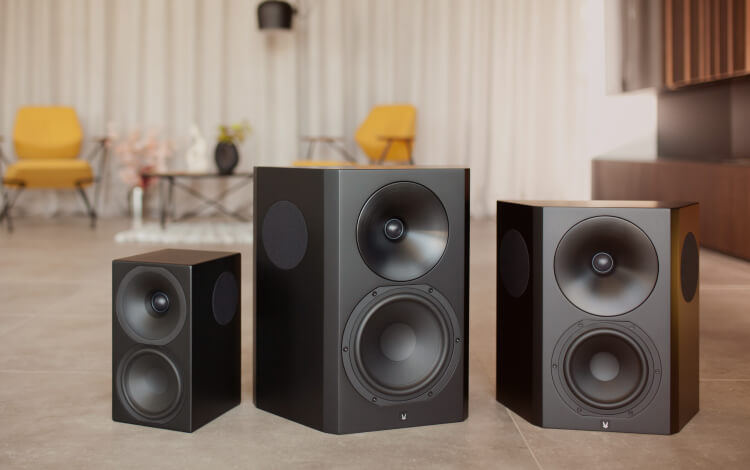
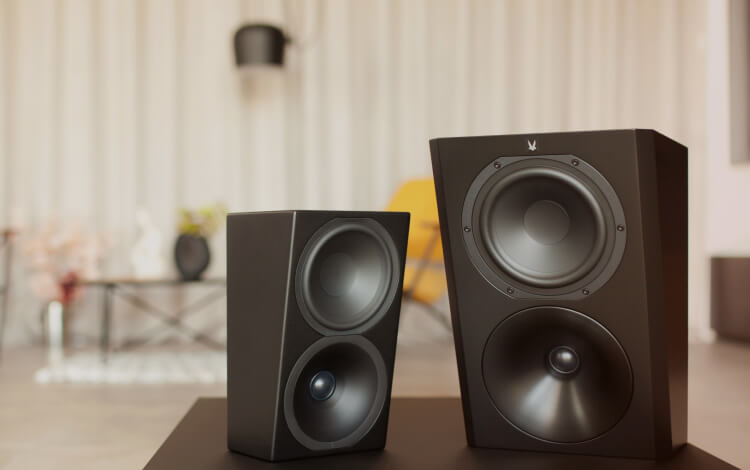
All Arendal Sound speakers are designed with an emphasis on not just having a linear on-axis (directly in front of the acoustic centre of the loudspeaker) frequency response throughout the frequency spectrum, but also off-axis. At Arendal Sound, we place much emphasis on having a linear power response – This being the sum of the frequency responses in all directions.
Much scientific research has been undertaken on this subject and a linear power response has a greater positive impact on the overall sound because the frequency response is more even in all directions. This means an Arendal Sound speaker will be more tolerant of differences in room shape, size, construction and materials.
In speakers with a tweeter mounted flat on the baffle, the frequency response can vary wildly compared to the ideal as you move away from this axis in any direction and that uneven sound reflects from elsewhere within the room and arrives back at your ears, tainting the flat response. This type of speaker will be very room dependent – read inconsistent from one room to the next.
The controlled directivity design that Arendal Sound has refined, aids the speakers in having a linear frequency response at the listening position, even when placed relatively close to sidewalls, so Arendal Sound speakers are relatively room-independent and allow more freedom with positioning. This does not mean they will not benefit from careful attention to positioning, but simply that positioned correctly, they will tend to remain, consistent performers, wherever you are listening to them.
In terms of the actual positioning in the room, there are a number of factors to balance and perfecting one element, can be at the detriment to others, so it is always a case of balancing stereo imaging, bass power, bass evenness, etc.
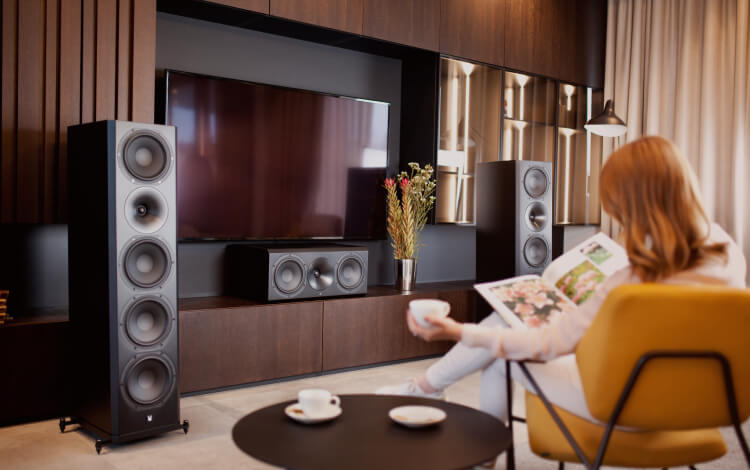
What follows are our general recommendations in line with the capabilities and design of Arendal Sound speakers. Most recommendations follow general convention because Arendal Sound Speakers are designed to work with normal systems in normal rooms and applications like Home Theatre mandate certain speaker placements and angles. We would also recommend that in a dual-use Home Theatre and Stereo System, you follow the guidelines for Home Theatre setup, as that will tend to benefit more than one person.
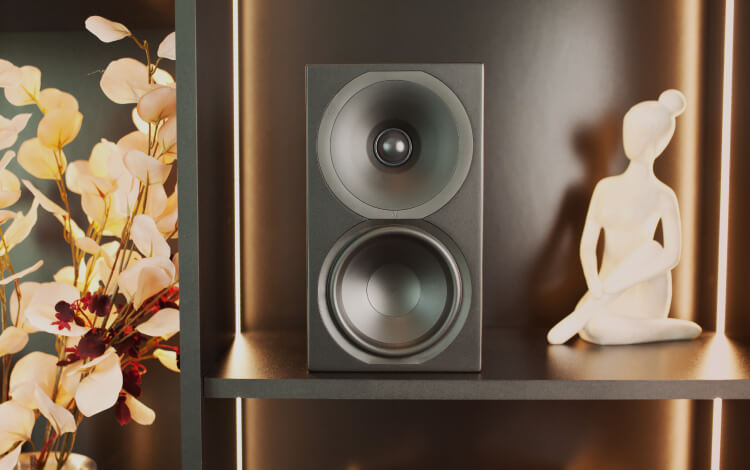
Positioning – Listening Axis
Most front loudspeakers like to be positioned with the listening pointing at ear height and that’s true for Arendal Sound loudspeakers. The listening axis is the point on the front baffle where the output of all of the drivers sums to a smooth whole, and in the case of Arendal sound with a mid/bass driver above & below the tweeter, the tweeter is at the acoustic centre and the axis is firing perpendicular to the baffle.
The Arendal Sound waveguide does a lot to lessen this requirement. As a result of carefully controlled dispersion and efficiency gains in the lower frequency regions of the tweeter’s output, potential issues inherent in normal tweeter implementations are shifted down in frequency where they are easier to deal with. However, listen too far above or below this axis and you will be changing the relative distances between the drivers and will be causing the response through the crossover regions to become uneven and ragged.
The spikes for Arendal Sound Tower speakers have been engineered to be easily adjustable without tools, from above the outriggers, without having to lift the speaker. Tilt them until you are on-axis in the horizontal plane and for the sake of aesthetics, the speakers are vertical when viewed from the front.
Positioning – Toe In
Whilst we have taken great care with the design of the Arendal Sound waveguide to control dispersion and reduce the impact of side walls, Arendal Sound speakers are designed to be toed-in toward the listening position, to further reduce issues from the closest boundaries. This will increase image focus across the soundstage and serve a wider range of listening positions more consistently in holding that focus between the loudspeakers rather than the sound collapsing toward the one which you are sitting closest.
In the case of Home Theatre use, we recommend the traditional equilateral triangle between you and the speakers, with them as far apart as you are from each loudspeaker. For stereo listening, we recommend you experiment, but rather that the 60deg angle of Home Theater, we feel a greater soundstage depth and focus is achieved with the front stereo pair closer to 45deg apart. This closer spacing does tend to serve the central listening position better, but stereo listening tends to be more individual.
In the stereo world, it’s also worth trying slightly less severe toe-in to help open up the soundstage a touch and allow it to breathe. However, that will result in a very gentle roll-off of the very highest frequencies and it should be balanced against the evil of early side-wall reflections.
Positioning – How to cope with walls and floors
We recommend a minimum 20-30 cm between the front wall and the rear of the speakers. Any closer than this will make the speakers sound muddy in the lower midrange and thicken the upper bass, making voices and instruments generally sound congested and indistinct.
Although Arendal Sound speakers are engineered to ensure a reduced amount of upper-frequency energy is lost sideways and that which is, is engineered to be of equal power across as wide a range of frequencies as physically possible, further from a sidewall is always better. The energy reflected from the sidewall effectively creates a wider phantom speaker between the point of reflection and the real speaker. If you add that time-delayed version of the sound to that arriving direct from the loudspeaker, it will not only make the sound busier and less clear, it will blur the size and positioning of images across the soundstage, as well as making the extreme left and right of the soundstage dominate over the central images.
One set of reflection points you really can’t avoid, wherever you point your loudspeakers, is the floor. We strongly recommend a rug positioned across the first reflection points. If you wish to know where these points are, place a mirror on the floor and the point at which you see the tweeter reflected in the mirror when seated in the listening position, is it. Use a bit of tape to mark the point and repeat for any of the other listening positions and for all of the front speakers. You will then see the area that needs covering and add 30cm in all directions for good measure.
Of course, this ‘good practice’ of soft furnishing the floors first reflection points, also applies to the walls we’ve previously mentioned. However, hanging rugs or other soft sound-absorbing items on walls is rather a matter of taste; or lack of, depending on your point of view.
Nonetheless, the methods described for the floor apply equally to the walls and at least one wall will generally have a window, which is even worse in acoustic terms than a painted wall. If that window has curtains, then the room will sound better with them closed. Whilst we’re getting picky – are you sitting on a leather sofa? If so, the hard surface of the leather places a mid-high frequency reflection point right behind your head. Cover it with something soft and it will have a positive impact.
If you’re lucky enough to have a dedicated room, then easily one of the biggest upgrades you can make to any system, is to add proper room treatment. It’s slightly out of the scope of this guide, but there is a massive range of pre-made and DIY solutions available. Backed with research and/or professional guidance, engineering the correct blend of absorption, diffraction and reflection can have an absolutely staggering effect on the quality of reproduction of even modest systems.
Getting back to the speaker positions; One final consideration is to try and ensure that ideally, the relative distance from the floor to the centre of the bass drivers, is not equal to the distance to the front wall behind and in turn, that the distance from that point to the sidewalls is different again. This has to do with the way bass reflects and reinforces/cancels within a room and by randomizing these distances, you are helping to spread out and reduce the impact of these room- (not speaker-) related artefacts. It’s just a logical extension of the golden ratios employed in ideal listening room dimensions to achieve exactly the same end.
Positioning – You
It would also be worth mentioning that, you the listener are also part of this bass and stereo imaging equation. Just as it is ideal for the speakers to create the right image depth, it is also ideal that you as a listener are 38% of the room’s length from the rear wall. This is considered ideal in terms of reducing the rear wall influence on the sound from the front speakers (that sound will have travelled just over twice as far and be over 4x quieter), but also divides the room’s dimensions so as to help smooth the bass response.
Again this is a rule of thumb as you don’t want that measurement to be equal to any of the three used to position the front speakers and preferably not a multiple of the speaker to front wall dimension for the same reason. However, moving a sofa an appreciable amount can be the cause of much ‘discussion’ in a family household, but as we said, these are just handy rules of thumb that should be accommodated, if they can.
Basically, other than the distance from you to each speaker, try and mix it up a bit!
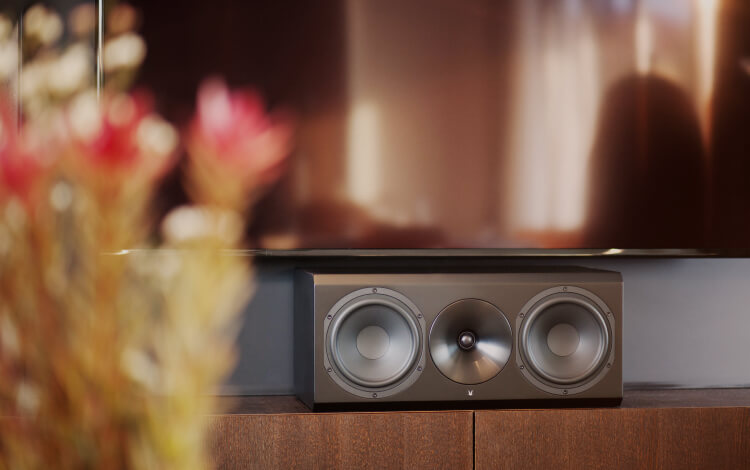
Positioning – Center Speaker
The Arendal Sound Center speakers use the tweeter waveguide to great effect. As previously mentioned, increased tweeter efficiency allows a lower crossover than conventional systems, so the problems of off-axis comb filtering have been greatly reduced and down-shifted to much less sensitive frequencies. Thus, Arendal Sound Center speakers are ideally suited to center duties and used with identical left and right monitors, provides an absolutely perfect tonal match.
Whilst positioning has been (relatively!) unproblematic to achieve for the front left and right loudspeakers, owing to the spatial freedom they enjoy, the center channel will have to deal with the small matter of fitting in with where your screen needs to go.
Whilst you might be able to fire the center speaker through an acoustically transparent projection screen, that obviously isn’t possible with TV displays. Do all you can to mount the center speaker up as high as possible (up against the TV) and try to avoid housing it in an enclosed space in a cabinet. It will just end up sounding thick, muddy and unclear on dialogue. Likewise, sitting the Arendal Sound Center speakers on a solid shelf that is up against the front wall is akin to putting the left or right speakers in a corner and will also thicken the bass and mid-bass making voices sound chesty and indistinct. In this case, you can at least pull the speaker to the front of the shelf to ameliorate this effect.
The center speaker equivalent of toe-in is limited to tilting it up/down until it’s firing straight at you. If you are lucky enough to be firing through an acoustically transparent projection screen, we recommend placing the center speaker at least ear height and if possible slightly higher as this gives additional help in terms of lifting the combined output of the front three loudspeakers up into the middle of the screen. For the best performance and tonal balance, the center channel speaker should be installed vertically. If you can mount three Arendal Sound Center, Monitor or Bookshelf speakers behind the screen, try and get them all to the same height, ideally 1/3 of the way up the screen, or ear height – whichever is higher.
Positioning – Surround Speakers
Our TriAxial surround speakers come in a configuration of Left and Right speakers. This design is a culmination of a regular direct-fi ring two-way speaker, with two full-range drivers added to the sides. It is a mix of a monopole and dipole configuration and in our opinion, this is the superior layout for a surround channel.
The reason for the left and right specific speakers is that the side-mounted drivers in this TriAxial surround are mounted out of phase with each other, is to create a large, rear surround field. The side driver that is in phase with the front-mounted drivers, needs to be the one pointing at the front speakers for optimal surround effect placement and steering. This means that the TriAxial surrounds are mirror-image pairs.
This speaker works equally well as height or presence channels as well and can even be mounted on the ceiling with our wall-mount brackets.
Ideally, you have a rectangular room, with at least 38% of the room behind the listening position, solid front and rear walls and nothing to block the forward and rearward radiation of the TriAxial Surrounds. Unlike the front speakers, the strong front and rear wall reflections are very much part of how the TriAxial (and any other surround with side-firing drivers) surround works.
TriAxial surround speakers should be ideally mounted 50-60cm above head height and directly to the side of, to 10deg behind the listening position. Higher will work too, as will a bit further back.
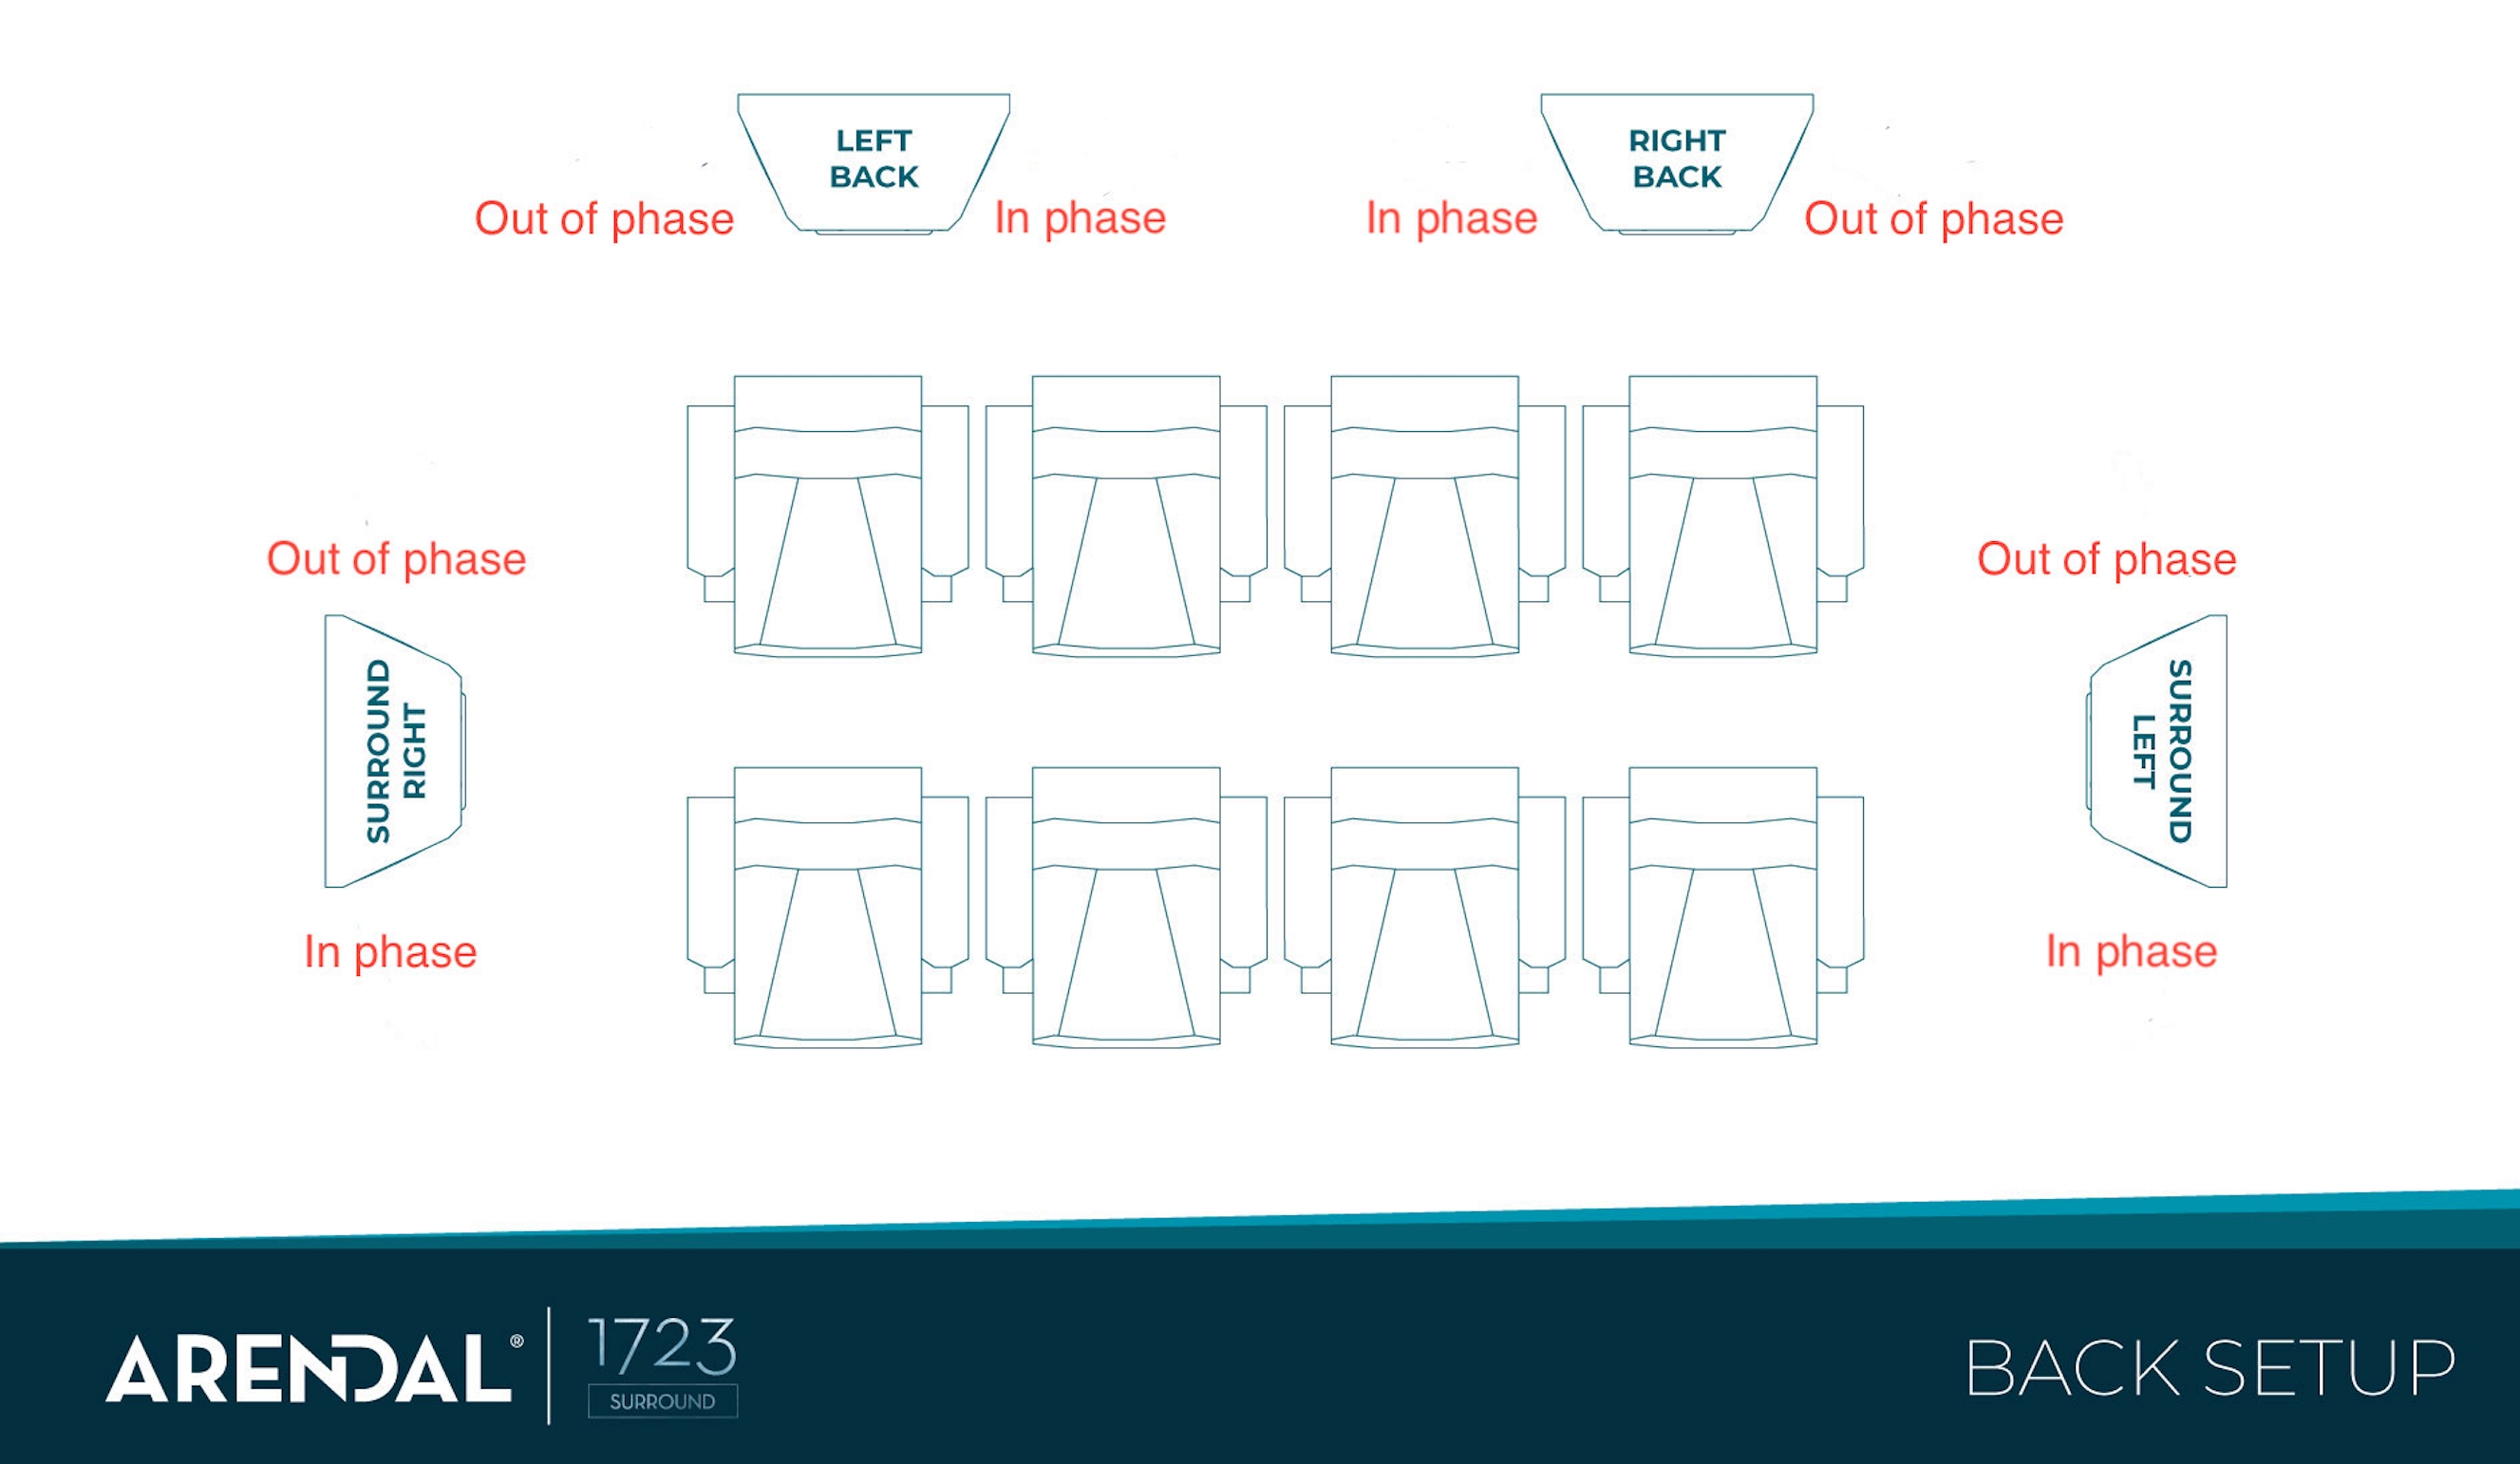
Surround Back Channels
When mounting as the surround back channels in a seven-channel system, the in-phase drivers should be mounted pointing at each other in the center of the rear wall. Meaning, the Left speaker should be placed in the Right position at the back wall, and the Right speaker on the left side. This means the out of phase drivers are working in phase with the out of phase drivers on the side channels. Between them, this pairing continues to assist with placing pin-point images at the rear, whilst working with all of the other drivers to diffuse the sound field around these effects.
Positioning – Height speakers
For height duties, be it for Atmos or Auro 3d, we recommend using our dedicated Height speakers, or even our TriAxial Surround speakers.
The Height speaker can be placed directly on top of an Arendal Sound Tower speaker for a sleek set-up in your room. We do not recommend doing this if your ceiling is made of acoustically absorbing materials of any sort. The ceiling is meant to reflect the sound back down to the listening position.
The acoustically best option of mounting the Height speakers is directly in the ceiling with a VESA100 mount, or on the wall close to the ceiling. Mount it so that it points towards the listening position, refer to specific setup for the type of format you are listening to, be it Atmos, Auro 3d or any other format with height duties.
Arendal Sound TriAxial surround speakers can very well be utilized for height duties. For Atmos setups with only 2 ceiling channels, they make a perfect choice, as with the side drivers enabled they will dish up a very involving sound stage that gives all listening positions a better sound comparatively to monopole designs. They should be mounted right and left as for surround duties, with the full range drivers pointing to the front and back of the room, with the tweeters facing each other. For setups with more than two height channels, we recommend monopole speakers.
Recap
- Try to avoid enclosing the center speaker in a cabinet or between shelves of a rack.
- Position the speaker at ear level. If you can’t point them up or down so they point at ear level.
- Position the left and right speakers at a maximum of 60deg, but no closer than 30cm to the nearest wall and preferably more to the sides.
- Cover the first reflection point on the floor with a rug as a minimum.
- Toe the speakers in to point directly at the center listening position, even if you habitually sit off-axis.
Now you can press the Auto EQ button!